How to Build a Deck: Step-by-Step Guide for Beginners
By Dave Kile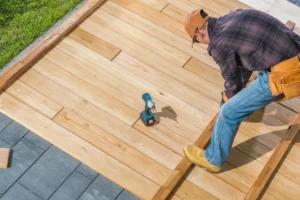 A deck can transform your backyard and the way you use it. Whether it’s barbecues with the family or a peaceful retreat at sunset, a well-built deck can become the heart of your backyard. I’ve helped many people transform their ideas into outdoor spaces they love. And it all starts with a plan and a clear approach.
This beginner’s guide covers everything you need to know about how to build a deck, from the early planning stages to framing and laying your decking. I’ll walk you through the tools, materials, and my step-by-step process, so you can confidently build a deck you’ll enjoy for years to come.
Design Your Deck
A great deck starts with a solid plan. Before any construction begins, take time to think through how the space will be used and what conditions your site presents.
Pro Tip: Check with your local council early to determine essential requirements that may impact your design decisions.
Define the Purpose and Layout
What’s the main goal for your deck? Hosting, unwinding, expanding your outdoor living space? That purpose will shape everything from layout to features like stairs, railings, and even built-ins.
If you’re planning to entertain, consider a spacious, open layout that accommodates a dining table and additional seating. For a laid-back vibe, a corner bench or planters can help carve out a relaxed lounging zone.
L-shaped layouts are a smart way to define separate areas, such as cooking and seating, while maximizing the space. If your site is sloped, tiered levels can help you work with the terrain, creating dedicated levels for relaxing, dining, and a small garden. For help choosing the right size for your space, check out this guide: What Should Be the Size of Your Deck?
The best decks I’ve built are the ones that truly fit how people want to live outdoors, and thoughtful layouts make all the difference.
Choose Your Deck Type
 These deck types are among the most manageable for first-time builders:
- Ground-level decks: Simple and accessible, great for flat yards.
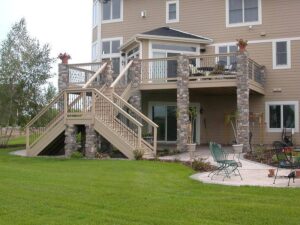
- Raised decks: Ideal for sloping blocks or homes with elevated doors.
- Freestanding decks are not attached to the house, allowing for flexible placement.
- Attached decks: Anchored to the house; requires ledger board protection.
When deciding which type is right for you, consider both how you want to use the space and what your site allows.
Consider Site-Specific Factors
Your backyard conditions can also influence your deck project. Here are a few essential things to take into account before finalising your plans:
- Drainage: Ensure water won’t pool under or around the deck.
- Sunlight: Think about shade options for hot climates.
- Access: Plan for safe entry points and enough space for stairs if needed.
- Bushfire risk or termite zones: May require specific materials or treatments.
- Existing concrete: If you’re building over concrete, this guide will help: Building a Deck Over Concrete
Once you’ve considered site requirements, it’s time to choose the right materials for the job.
Choose Materials
Australian decks need to withstand a lot, from UV exposure and moisture to termites and temperature swings. Some popular decking choices that can meet these challenges:
- Merbau and Spotted Gum: Durable hardwoods with rich colour.
- Treated Pine: Budget-friendly and readily available.
- Composite decking: Low-maintenance and moisture-resistant—my top pick for long-term performance.
Regardless of the decking boards you use, remember that a durable, protected substructure is equally important. That includes the joists, bearers, and ledger board, all of which are typically made from pressure-treated pine or hardwood.
Tools and Supplies Checklist
Here’s what you’ll need for most deck builds:
Measuring and layout
- Tape measure
- Spirit level or laser level, and string line
- Speed square or framing square
- Chalk line (optional)
Cutting and drilling
- Circular saw
- Impact driver (for framing and structural screws)
- Cordless drill (for decking clips or hidden fasteners)
Framing and decking
- Joists and bearers
- Decking boards
- Decking fasteners
- Structural screws (for framing connections)
- Hammer and nails (for joist hangers)
- Joist hangers
Site preparation and foundation
- Post hole digger or shovel
- Concrete
- Post anchors or stirrups
Recommendations
- Spacers or decking jigs (for consistent board gaps, if needed)
- Trex Protect Joist, Bearer & Rim Tape
- Trex Seal Ledger & Sub-Ledger Tape
- Clamps or board straighteners
Safety gear
- Gloves, goggles, and hearing protection
Step-by-Step Deck Construction
Before you begin construction, check with your local council to determine the structural requirements and any necessary permits. Use span tables to confirm acceptable distances between posts, bearers, and joists based on your chosen materials and deck size.
Now, it’s time to get building!
1. Prepare the Site
Clear any vegetation and mark out your deck using string lines and pegs. Double-check that your layout is square by measuring diagonally from corner to corner in both directions. If the numbers match, you’re square. Ensure the ground is stable, compact, and drains well.
2. Install the Ledger Board
If your deck will attach to the house, you’ll need a ledger board. This is typically a length of treated pine or hardwood that runs along the wall and serves two purposes: it anchors the deck frame to the building and supports one end of your deck joists.
Before securing the ledger, I recommend applying Trex Seal Sub-Ledger Tape directly to the wall to create a moisture barrier behind the board.
Next, ensure the ledger is perfectly level; this is important because it sets the reference point for the entire frame. Use corrosion-resistant bolts or screws to attach the ledger to the structural framing of the house, not just the cladding. Once the board is fastened, apply Trex Seal Ledger Tape over the top and face to complete the seal and prevent water from getting in and causing rot.
For more on protecting your deck from moisture, check out my article How to Create a Waterproof Deck.
3. Set the Footings
Footings transfer the load of the deck to the ground and support the vertical posts. For raised decks, concrete footings usually receive post anchors or metal stirrups that are bolted to the cured concrete. These hold the base of the posts above ground level to prevent moisture damage. On ground-level decks, stirrups set directly in concrete may also be an option.
Pro Tip: Protect your freshly poured footings during curing by covering them with plastic sheeting or damp hessian, and misting them with water if needed.
Once the footings are cured, use a string line or laser level to align your vertical posts and secure them into the anchors or stirrups with bolts or outdoor-rated structural fasteners. The posts will support the bearers above and help establish the height and level of your deck.
4. Install Bearers and Joists
Start by positioning your bearers. These are typically large, square or rectangular treated timbers (for example, 90 × 90 mm or 140 × 45 mm) that run parallel to the house, if attached, and sit atop the vertical posts. They’re usually spaced 1.5 to 2 metres apart, depending on span and load, with the outermost bearer defining the edge of your deck frame. Check for square and level, then secure the bearers using framing brackets, such as triple grips or structural screws.
Next, install your joists. These run perpendicular to the bearers (or from the ledger to the outside bearer) and support your decking boards. Typical spacing is:
- 450 mm centres for timber decking
- 400 mm centres for composite decking
Plan for your joists to slope slightly away from the house, approximately 3 mm per meter, for proper drainage. Secure joist hangers to the bearers (and ledger) first, then install each joist by fastening it into the hanger with structural screws or joist hanger nails. I’ve seen DIY builds skip joist hangers entirely, but these metal brackets cradle the joists and keep them stable, making them far safer than the failure-prone end-nailing or toe-nailing methods.
Once your joists are in place, I always install Trex Protect tape across all the top horizontal surfaces to seal out moisture, improve fastener grip, and prevent frame rot. It’s one of the simplest things you can do to extend the life of your deck. Read more about what joist tape does here: What Does Joist Tape Do?
Pro Tip: Add Trex Protect behind your joist hangers, too, to prevent moisture from getting trapped between the metal and the timber.
Double-check that all joists are level and evenly spaced to avoid problems when laying your decking boards.
5. Install the Deck Boards

Start from the house, or from a straight, central reference line on freestanding decks, and work your way out. Leave sufficient spacing between boards, typically 3–5 mm, to allow for drainage and expansion.
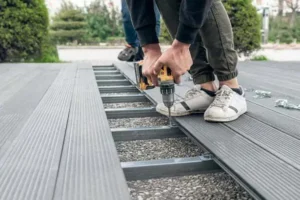
Select fasteners that are suitable for your decking material, and consider using hidden fastening systems for a clean, seamless appearance. If your chosen fasteners don’t create the desired spacings automatically, use jigs or spacers to ensure consistent gaps. If you’re face-screwing your boards, fasten each board at every joist intersection along its length and be sure to pre-drill the holes at board ends to prevent splitting.
6. Add Stairs and Railings
Follow local code for stair dimensions and railing height. In bushfire zones or around pools, extra requirements may apply.
Use brackets and stringer hangers at stair connections or where support is needed, and anchor posts securely to your framing using structural screws or galvanised brackets.
Railings can be timber, metal, or composite—choose options that suit both your deck’s design and required safety standards. If you’re unsure about compliance, ask your local building authority.
How Much Does it Cost to Build a Deck in Australia?
Deck costs vary based on materials, size, and whether you DIY or hire a pro. As a rough guide:
- DIY timber deck: $300–$600 per m²
- Professional timber deck: $500–$1,000+ per m²
- Composite deck: $800–$1,200 per m² (installed)
Maintenance Tips for Long-Term Durability
Even with the best materials, decks still need care. My advice:
- Keep the gaps between boards clear of debris; sweep as needed
- Clean seasonally with a soapy water or deck cleaner
- Inspect regularly for loose screws or damaged boards and address issues immediately
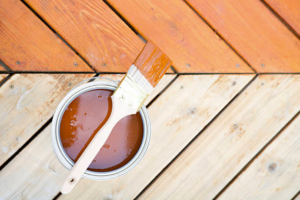
- Reseal timber decks every 1–2 years or as recommended for the species
Frequently Asked Questions
Here are some of the most common questions I hear from first-time deck builders.
Do I Need Council Approval to Build a Deck in Australia?
It depends on the size and location. Many decks under 1 metre high don’t require approval, but always check with your local council or state building authority.
Can I Build a Deck Myself, or Should I Hire a Professional?
If you’re comfortable with tools, a DIY deck is very doable, with low or freestanding decks being the simplest to build. For unique conditions and complicated designs, it’s often best to work with a licensed builder, particularly if you’re feeling unsure.
What’s the Average Time it Takes to Build a Deck?
It’s possible to build a ground-level deck of up to 20 square metres in a weekend if you have a helper and time to make some preparations in advance. More complex deck builds may take 1–2 weeks or longer, especially if you’re including stairs, railings, or obtaining permits.
Conclusion
A deck is a rewarding backyard upgrade. It’s an investment in lifestyle, enjoyment, and the lasting value of your home. And yes, it’s absolutely a project you can handle on your own! Take it step by step, stay focused, and enjoy the process. Before long, you’ll be standing on your new deck, ready for fun weekends, relaxing evenings, and many years of memories to be made.