Step-by-Step Staining Your Deck
By Dave KileStaining your deck is a DIY job any homeowner can accomplish. Preparing the deck surface, picking the right color stain, and applying it with a little care and patience, will go a long way in making an old deck look new again and help protect the wood surface for a very long time. So whether you are looking to add some color, spruce up and protect your family’s most-used backyard area, or looking to brighten up your deck’s color, staining is something you can manage with a few easy steps.
Here’s how to proceed:
Cleaning And Preparing
As with most home improvement jobs, preparation is key when staining your deck. Gathering your materials and tools, conducting a deck inspection, attending to any repairs, and doing a good cleaning will assure you of optimum results.
Material and Tools Needed to Stain a Deck
Gathering the right materials, tools, cleaners, and correct stain is your first step in assuring a job well done.
Here’s a list of what you’ll need:
- Rubber Gloves
- Protective goggles
- A Mop With Stiff Bristles
- Hose or Pressure Washer
- Deck Detergent
- Sand Paper (optional)
- Cleaning Rags
- Deck Cleaner
- Waterproof Tape
- Paint Brush and Paint Roller
- Drop Cloth
- Wood Deck Brightener (optional)
- Sprayer (optional)
- Deck Stain
- Sealer
Pick a day for staining where there is no call for rain and, if you can manage it, a day where the sun isn’t blaring. You don’t want to get halfway into the staining process when it begins to pour, and direct sunlight can make the deck too hot and lead to peeling if the stain dries too quickly.
Deck Inspection: Looking for Imperfections
A crucial part of the actual preparation is conducting a thorough deck inspection. Walk around your entire deck’s surface, paying attention to spots where the deck boards might be broken or gravely uneven. You are also looking for raised nails or screws, puddles or areas where water might have pooled, mildew or algae might have accumulated, or any other problem areas.
Following this checklist will help ensure you have all your bases covered.
Do You Need to Sand Your Deck Before Staining?
During this deck inspection, you will come to look over the condition of the wood on your deck. Could certain spots or even the complete deck benefit from a good sanding? Sanding a deck before staining it is often the most important part of the preparation process.
Cleaning and Preparing Your Deck

You’ve gathered your materials, had a good walk around, and maybe have even sanded your deck; now you need to clean it and prepare the area for staining.
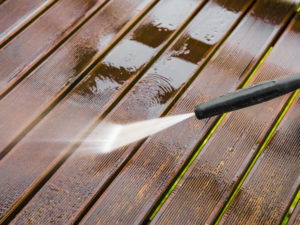
Using a specific deck cleaner for this step, a power washer or hose, and a hard bristle brush will ensure that you leave a clean wooden surface that facilitates the smoothest application of stain and leads to a complete “curing” when it finally dries.
Remember, a clean deck is most important for a smooth application and even drying your coat of stain. In addition, many homeowners find that applying a wood deck brightener (or deck neutralizer) helps lower the pH level of the wood after a cleaner is applied. Using a wood deck brightener leaves the pores on your boards open and, in effect, ‘brightens’ the wood to create an even more welcoming surface for the stain.
Next, you want to block off any surface around your deck—plants or vegetation, ornamental rock surfaces, railings—and remove all furniture. This is where your tape and drop cloth come in.
Before you get down to staining your entire deck, find a small out-of-the-way area of the wood surface where you can quickly apply a spot of stain. From this small application, you’ll be able to determine if this is the color stain you really want for your deck. In addition, if you apply a semi or clear stain to your deck, this will allow you to see how the stain reacts to the color of your deck.
Applying the Stain
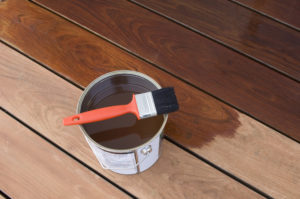
 Suit up with your goggles, gloves, a good old shirt, pair of pants, and boots. Using your roller, brush, or sprayer (or a combination of these), apply your stain to the open-end area of the boards first, then tackle two to three boards at a time. “Back brushing” (use your large paints brush and go ‘back’ over the stain you have applied to better soak it into the deck boards) can also be executed to smooth the stain even better.
How Long Does It Take To Stain a Deck?
Homeowners all too quickly ask: “How long does it take to stain a deck?” The answer here depends on how big your deck is, the condition of its wood grains before staining, and the climate where you live. After applying one full coat of stain, wait for it to dry, then look your deck over to see if you want to apply another coat. When completely done with staining, it is recommended to wait three days before returning furniture to the desk’s surface and engaging in its full use.
Patience in the above will see your stain applied as expertly as possible, drying correctly, and if and when it rains across your now well-protected deck, the perfect sheeting of water across your wooden boards, leaving no puddles or stains.
Choosing Between A Semi-Transparent Stain & Solid Stain
Want to add color to your deck while still wanting to enjoy its natural wood? Apply a semi-transparent stain. These stains are generally more durable than transparent and protect the deck and its color from weathering and fading.
Although you can apply a semi-transparent stain over a semi-transparent stain, it is generally not recommended to use a semi-transparent stain over a solid-stained wood; semi-transparent stain does not penetrate wood that has a coating (color stain) already on it.
Solid stains are great for protecting decks that undergo various weather changes or are exposed to elements like a nearby ocean or bay. Your choice of color with solid stains is quite varied, and these colors will help hide imperfections in your deck’s wooden boards if you have any. Solid stains can also be used over other types of stains and even paint.
Unlike semi-transparent and transparent stains, though, solid wooden stains can be susceptible to cracking and peeling.
Here’s more information for fully understanding the differences between these two types of stain.
Water-based stain vs. Oil-based stain
Traditionally, homeowners used soil-based stains on decks. This is because soil-based stains penetrate wood grain well, last long, and look good. But homeowners have been learning about some certain disadvantages of oil-based stains and have readily switched to water-based stains.
Made of natural resins as they are, oil-based stains often breed algae and mold. To combat this, more and more chemicals have been added to modern oil-based stains, compounding the negatives of using this stain. In addition, when sunlight and rain bring these added chemicals to the surface of the wood, they render the deck dangerous for anyone walking across barefoot. In fact, many U.S. states have almost completely outlawed selling oil-based stains. Oil-based stains also take longer to clean up and longer to cure.
Water-based stains do not present any of the problems that oil-based stains do and are generally easier to apply. You should be cautioned, though; water-based stains are less durable than oil because they can chip easily and not set into the wood as deeply as oil-based stains. And in their quicker drying process, bubbles and dirt can infiltrate a water-based stain easier than an oil-based. This is another reason you should pay critical attention when washing and preparing your deck.
Maintain Your Deck
Gathering the right materials, preparing, watching the weather, applying a steady application of the stain, and a little patience will go far when it comes time to stain your deck. By staining and maintaining your deck, you will enjoy it for years to come.
