How to Build a Floating Deck
By Dave KileA floating deck is one of the easiest ways to get your hands on a solid outdoor space. With no ledger board to attach to the house and no major digging or concrete pouring, floating decks can even be built over a flat roof. You need to lay out and level the support blocks and then build the deck over them. In no time, you’ll have a sturdy, low-maintenance platform to enjoy the outdoors.
 Read on to learn how to go about it, including what materials and tools to use, how to select and level the site, and how to frame and cover your deck so it withstands the elements.
Materials and Tools Needed
Instead of being anchored to your house, a floating deck—also called a free-standing deck—rests solely on low-rise blocks that allow it to “float,” meaning it can shift slightly with the ground.
A floating deck is ideal for DIYers looking for an easier project that lowers the cost of deck installation since it involves less digging and concrete work than a conventional deck. Plus, because a floating deck is close to the ground, it comes with fewer permitting issues compared to decks with poured concrete, stairs, and handrails.
Essential Materials

The basic materials for building a floating deck are the same as what most decks use: pressure-treated lumber, composite or wood deck boards, concrete footings (blocks in this case), joist hangers, fasteners, and flashing joist tape.
Pressure-treated lumber. Make sure the lumber is rated for ground contact. After making cuts, apply a sealant to the end grain of the boards. That helps to preserve the wood’s resistance to rot and insects.
Deck boards. Composite boards resist fading and decay better than most natural woods. While wood offers a traditional look that many people prefer, it also requires sealing or staining every year or two.
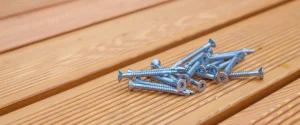
Fasteners. Use only hot-dipped galvanized, coated, or stainless-steel fasteners. Otherwise, corrosion will weaken the connections and your deck won’t last.
Joist hangers. The primary hardware used in building a deck, metal joist hangers that secure the joists to ensure structural integrity and proper load distribution.
Deck blocks. These concrete blocks act as footings for the deck. They nestle into the ground to support joists, beams, and posts. They don’t need to be set below the frost line like conventional footings.
Flashing. As a freestanding platform, a floating deck requires only one type of flashing: joist tape, a waterproof membrane that covers the top of the deck’s joists. Apply it before screwing down the deck boards to protect the wood from moisture and extend the deck’s service life.
Other. In addition to these basics, your materials list might include wood gravel to place under the blocks, landscape fabric to prevent weeds, and skirting or lattice to give the deck a finished appearance and to keep animals from burrowing under it.
Recommended Tools
The project requires only basic carpentry gear to measure, cut, assemble, and secure the deck.
Here’s what you’ll need:
- Circular saw: For cutting the deck boards and framing materials.
- Drill/driver: For drilling pilot holes and driving screws.
- Level: For ensuring your deck is flat.
- Tape measure: For taking accurate measurements.
- Hammer: For nailing on joist hangers and other minor tasks.
- Shovel: For digging holes for footings and removing turf.
- Safety gear: For protection, including gloves, safety glasses, and hearing protection.
Other handy tools include:
- Chalk line and line level: For laying out long straight lines and to level the deck blocks.
- Speed square: For marking angles and square cut lines.
- Socket wrench: For tightening threaded connections.
- Miter saw: For faster, more accurate cuts than a circular saw.
- Clamps: For holding boards in place while you fasten them.
- Impact driver: For driving screws more easily.
Foundation and Footing Placement
Site selection and footing placement are very important. Here’s what to keep in mind.
Choosing the Right Location
 The best sites for floating decks are flat or slightly sloped, because they make construction easier and reduce the need for leveling or excavation. If your site isn’t flat, dig out the high spots and/or add gravel to the low spots.
Think about how you’ll use your deck and your pathway to it. In my experience, the closer you build the deck to a door or an existing path, the more likely you are to use it.
The site should also have good drainage so that water doesn’t pool under the deck, which can promote rot and/or exacerbate frost heave in cold climates. You’ll also want to know how much sun the deck will get. While a sunny location can make your deck more enjoyable and help keep it dry, all-day sun exposure can make it too hot, which might inspire you to add a pergola or shade sail.
Be thoughtful when building near trees. Roots can lift your deck or crowd your footings over time, and building directly under trees might leave the deck splattered with sticky sap or covered in tree litter.
Last, be sure to consult the local building code. While the International Residential Code (IRC) states that no permit is required for decks of 200 square feet or less that aren’t more than 30 inches off the ground, local codes might be more restrictive. There could also be setback requirements, which spell out how close you can build to your property line.
Placing the Footings
Laying out the footings and getting your base square and level are a must, so take your time. Begin by hammering wood stakes into to ground where the deck’s four corners will be. Then tie a string from stake to stake to outline the perimeter. Keep the string tight and level it using a line level. Next, from one corner, measure 3 feet along one string and 4 feet along the other. The diagonal between those points must be exactly 5 feet to form a 90-degree corner. Adjust the stakes until it’s perfect, which you can check by measuring diagonally corner-to-corner (both directions). If the diagonal distances are equal, your lines are square and you’re good to go.
Place the footings (blocks) at each corner and every 4 feet along the stringed perimeter. Make sure that they align with joist layouts and will sit directly under the joists, which are typically spaced 16 inches on-center. (Composite deck boards or custom deck patterns could require 12- inch or customized spacing.)
Using the string lines as guides, spray paint the ground where each block will sit. Remove 6 to 9 inches of topsoil and turf, compact the bottom with gravel, and set the blocks so each is level with the others by adding or removing gravel.
Building the Deck Frame
Assembling the deck frame is straightforward.
Measuring and Cutting
Working from a sturdy set of sawhorses or other flat surface, cut the perimeter (rim) joists to length with a power saw. A miter saw is the best choice for beginners to ensure square, accurate cuts, but a handheld circular saw and speed square will also do the job. Square, precise cuts will ensure square corners and tight connections.
Securing the Joists
Connect the rim joists at the corners using structural screws and then mark the joist spacing on them using a tape measure. With a speed square, draw vertical lines where each joist will go. Then align the joist hangers on them and fasten with joist hanger nails. Next, cut the joists to length and insert them into than hangers. They should fit snugly and rest evenly on the concrete blocks. Fasten each side, ensuring that the tops of the joists are flush with the rim joists. Next, apply joist tape over the top of all the joists to prevent water from seeping into screw holes and from pooling on exposed wood.
Leveling the Deck
Before you add the decking, double-check that your framing is level by laying a long level across the joists and rim boards or by running a level string line from one corner to the opposite corner and measuring down from it to the joist tops. Check multiple points to identify any high or low spots. If you find joists that are out of level, slide plastic (not wood) shims between the block and the joist to raise it as needed. While it’s possible to adjust the depth of the blocks instead, I don’t recommend doing that at this stage. Place the shims completely under the joist, not just under an edge.
Decking Installation
Each type of deck board has its pros and cons in terms of cost, durability, upkeep, and aesthetics. Here’s what to know.
Choosing Deck Boards
 Wood decking, such as pressure-treated lumber or cedar, is initially cheaper but requires regular sealing or staining and is prone to warping, rot, and splintering over time. Most wood lasts 10 to 15 years if it’s well cared for. Composite decking costs more than many woods but offers superior durability, better moisture/rot resistance, and lower maintenance (no sealing or staining). Expect composite boards to last 25 to 30 years or more. In short, wood is budget-friendly but high-maintenance, while composites are an investment in long-term durability and ease.
Proper Board Installation
To install the deck boards, start at one edge of the frame and lay the boards perpendicular to the joists. Use spacers or a decking jig to leave gaps of 1/8 to 1/4 inch for proper drainage and natural expansion/contraction. Make sure the boards are straight and aligned before fastening them with deck screws, hidden fasteners, or clips.
Conclusion
Building a floating deck starts with a flat, well-drained site and a stable foundation, followed by a sturdy frame and snug deck boards. Finish the project by adding skirting or trim or maybe a pergola. But don’t stop there. Plan on regular maintenance—cleaning, sealing wood, or inspecting fasteners—to keep your deck safe and beautiful.
With a little forethought and care, most DIYers can create a functional, inviting outdoor space that adds comfort and value to any yard. Keep it simple, enjoy the process, and personalize it to make it truly yours!
Sources
TrexProtect. What is a Floating Deck? Retrieved April 23, 2025, from https://trexprotect.com/blog/what-is-a-floating-deck/
TrexProtect. Creating a Floating Deck Over a Flat Roof. Retrieved April 23, 2025, from https://trexprotect.com/uk/blog/creating-a-floating-deck-over-a-flat-roof/
TrexProtect. Cost of Deck Installation: How Much Does It Actually Cost? Retrieved April 23, 2025, from https://trexprotect.com/blog/cost-of-deck-installation-how-much-does-it-actually-cost/
Plasticine House. 8 Ground Level (Floating) Deck Footings Options. Retrieved April 23, 2025, from https://plasticinehouse.com/floating-deck-footing-options/
House by the Bay. How to Build a Floating Deck. Retrieved April 23, 2025, from https://www.housebythebaydesign.com/how-to-build-a-floating-deck/
Seamster. Build a Floating Deck. Retrieved April 23, 2025, from https://www.instructables.com/Build-a-Floating-Deck/