How Do You Protect Deck Joists?
By Dave KileAlmost all decks in the United States (about 90%) have wooden framing. That means that the joists and beams that support your entire deck consist of fibers that break down over time when exposed to moisture. Even with pressure-treated wood or a high-quality deck board like ipe, water is a threat to your wood deck.
That’s why you must protect your wood from water from the start — at construction. The key to protecting your wood frame is using high-quality joist tape to cover the tops of joists, beams, and rim joists.
What is Joist Tape, and How Does it Work?
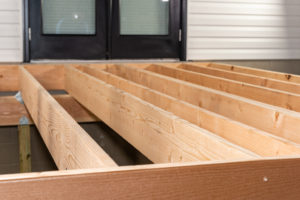
Joists, the repeated horizontal structures used to build a deck frame, are located just below your deck boards. Beams are the vertical, main load-bearing elements that stand beneath your deck and support the joists’ weight and flooring. The beams are often secured in footings, cemented into place.
Both joists and beams are generally made of wood, even if you install composite decking like Trex. Whether using ACQ wood or other treated lumber, during construction, you can add one economic and efficient element to prevent wood rot and extend the life of your deck: joint flashing tape.
 With a quality butyl tape, you can add years to your deck’s usefulness. Use it as a sealer for the tops of your deck joists, rim joists, beams, and ledger boards. The tape is applied directly to the top edge of the wood. The builder must do this during construction or when replacing the deck boards. That is because the tape sits on top of your deck’s substructure, below the deck boards.
Joist flashing tape provides a thin, waterproof barrier, like using a sealant on your decking boards, but more permanent and effective. Flashing is often also used around window and door openings, roofing, and fastenings to ensure waterproofing.
On decks, the joist flashing tape is applied as a cap to the substructure, allowing the wood to breathe on three sides while acting as a water barrier on top, where condensation often collects. The flashing tape also protects around screw holes and openings created by construction hardware. The flashing tape prevents water from seeping into tiny cracks and spaces created by the fasteners and joist hangers, which can cause corrosion. Additionally, when deck screws pierce through the flashing tape, the tape can help hold the screws in place.
What Works Best?
 Don’t skimp — buy the best quality joist tape on the market. Check out this comparison before you buy DeckWise, Vycor, or Trex Protect. You want to ensure durability and ease of installation.
Butyl tape typically has a longer life than asphalt tape. That’s because asphalt tape starts to break down with repeated exposure to sunlight. On the other hand, butyl tape can withstand the test of time. Trex Protect, the only joist tape that comes with a 25-year warranty, from Trex – the World’s #1 Decking brand — provides you peace of mind knowing that your joists and beams will last as long as the decking it supports.
Butyl tape is also easy to install. That’s a plus, whether you’re a contractor or a DIY homeowner. With a self-adhesive butyl tape, it lies directly on the boards requiring minimum cuts and little overlap. A butyl tape with a non-skid surface makes it safer for the installer to walk across during application.
How Can I Install Joist Flashing Tape?
 First, to find out exactly how much Trex Protect® Joist & Beam Tape your project requires, use our Materials Estimator.
Next, installing joist tape is a relatively simple process:
1. Get ready. Apply Trex Protect Tape to horizontal and vertical surfaces. Trex Protect comes in three widths, making it convenient to apply to joists, beams and rim joists: Use 1–5/8″ (41.3 mm) Joist Tape for joists and 3–1/8″ (79.4 mm) Beam Tape on all double joists and beams and 11″ (279.4 mm) for rim joists, stairs and all flat-blocked surfaces.
When pulling deck boards onto the deck, use a piece of plywood or wafer board to overhang the edge of the deck. This method prevents the product from rolling up and pulling up from the joist.
2. Clean the joist surface to make sure it is dry and free of any debris.
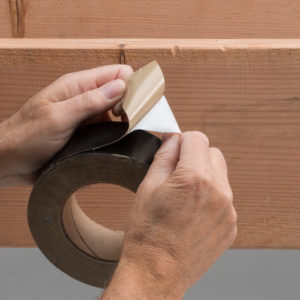
3. Remove the backing while applying the tape directly to the surface. Run your hand over the tape and firmly press it onto the joists.
4. After covering the joists, beams, and rim joist with tape, cut the tape to length with a utility knife or scissors.
Do You Need Blocking Between Deck Joists?
Blocking is installed between the joists to keep them upright and to strengthen your substructure. Blocks, shorter pieces of wood, fill the spacing between two joists.
Place small pieces of blocking in a zig-zag pattern between the perimeter joists. They can also be installed level with the tops of the joists to create a solid surface. Creative decking styles, such as parquet, will require extra blocking. If you’re a DIYer, this decks.com blog explains how to install blocking and bridging. You can also find helpful deck-building books on Amazon.
Is 2×6 Good for Deck Joists?
 A solid foundation is essential for the longevity of your deck. Thus, you should make sure you’re using the right materials, including the right-sized joists.
According to Decks.com, most two-story decks require 2×10 deck joists, while ground-level decks use 2×6 joists. If stairs are required, use 2×10 joists, exceeding the depth of the first step. Check out this Decks.com chart that details the size of joists and beams needed for different sized decks, deck designs, and other kinds of wood. For example, pine has different requirements than fir or cedar.
Decks are tremendous home improvements that add beauty and space to your home. Be sure your investment lasts as long as possible with the protection of deck joist flashing tape. Don’t let joist rot undermine your beautiful outdoor living space. Ensure your substructure lasts as long as the warranty on your composite decking boards!