Deck Post Size Guide: Find What Works Best for Your Design
By Dave Kile
Few homeowners spend much time thinking about deck support posts, and I can’t blame them. While the posts are essential to upholding your deck, they seldom become a design element unless you’re building an elevated or two-story deck.
Still, as a DIYer, you need to know what posts are available, the size to use, and how to install them so they stay sturdy and straight (plumb). Read on to find out what factors will dictate your choice of support posts for a wood deck.
Common Deck Post Sizes
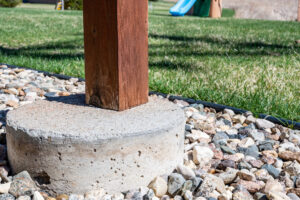
Most deck construction calls for either 4×4 or 6×6 square posts, although 4×6 and 8×8 posts are also available. Whatever the size, the wood post should be pressure-treated southern yellow pine—or another suitable wood species—with a label stating that it is suitable for ground contact. (In reality, the post will sit on a metal base, not the ground.) Do not use untreated lumber, railroad ties, or landscape timbers as posts.
Key Considerations for Deck Post Selection
Your deck’s load requirements, its design, and where you build it will determine post size.
Structural Support

Height and Spacing
As a deck’s height (post height) increases, so must the size of the posts to withstand the additional lateral force. A 4×4 post can be used for decks up to 6 feet high, assuming the downward load is accommodated. But, most deck builders prefer 6×6 posts for greater strength and stability, which reduces the need for diagonal bracing (knee braces). Like a deck’s joist span, the distance between the posts (beam span) is another important factor. The greater the post spacing, the larger the posts must be because each post must carry a larger percentage of the deck load.
Compliance with Local Regulations
The International Residential Code (IRC) is the standard that most jurisdictions adopt, but many local codes augment it. Ask your building authorities for a “cheat sheet,” or summary, of the applicable local code for decks. The information will help you calculate the size and number of posts your deck design requires. Some building officials require that an engineer make or endorse these calculations. That’s fine, because you don’t want the headache of identifying things like the deck’s “tributary area” or calculating the “deflection” of structural members. Find a builder who will do that for you.
Choose the Right Post Size

Tips for Installing Your Deck Posts
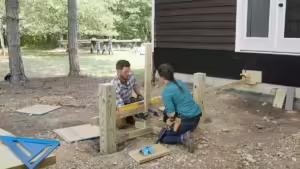
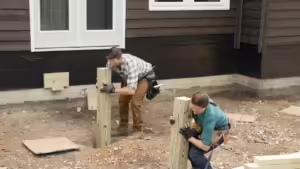
Installing the support posts is straight forward once you understand how they connect to the footing below and the beam above (header). But here are some ideas that could make the work easier.
Don’t rush the installation. Let the concrete footings cure for 24 to 48 hours before you mount the posts.
Use a post level instead of a regular level. With two legs set 90 degrees apart, the post level lets you check two post faces for plumb simultaneously. Install temporary braces to keep the posts plumb.
Install the correct hardware (post base and post cap) and fasteners and follow the manufacturer’s instructions. For instance, Simpson Strong-Tie recommends that the footing have at least 3 inches of concrete coverage around the post. That means the footing size (diameter) must be at least 8 inches for a 4×4 post and 12 inches for a 6×6 post.
Leave the posts longer (higher) than needed. Once they’re all anchored, cut them to the correct height. If you’re installing posts on a sloped surface, you must cut each post to a different length to maintain a level deck surface.
To ensure straight cuts, mark them with a speed square. If you can’t keep the saw level, screw a scrap of 2×4 to the post to support the saw. If you don’t want screw holes in the post, clamp the scrap board instead.
Protect the cut ends of the posts from moisture by applying a water-resistant coating or flashing tape.
