How to Restore a Deck
By Dave KileI’ve spent years helping homeowners protect and extend the life of their decks. Australia has some of the best outdoor spaces in the world, so it’s no wonder homeowners want to take advantage of this lifestyle. But I also understand that the country’s harsh climate can be tough on timber and composite decks alike. If your deck is starting to look a little worse for wear, don’t worry—restoring it can bring it back to life, improve safety, and save you from costly repairs in the future.
For me, restoring a deck isn’t just about making it look good. I’ve seen how regular maintenance prevents long-term damage, keeps your deck safe for family and friends, and ensures it lasts for years. Whether your deck is made from timber or composite materials, I’ll walk you through the key steps that I use to bring it back to its best.
Deck Restoration Steps
Bringing your deck back to life involves a few key steps, and getting each one right will ensure you end up with a durable, great-looking outdoor space. I’ve gone through this process many times, and I’ll share my best tips along the way.
1. Inspecting and Assessing Deck Condition
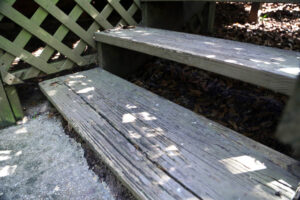 The first step I always take is inspecting and assessing the deck condition thoroughly. I check for loose, warped, or rotting boards, as well as any protruding nails or screws that could cause injury. When I’m assessing a deck, I always look at:
- Weak or wobbly railings and stairs
- Signs of pest damage or wood decay
- Support beams and joists that may be deteriorating
A simple trick I use is pressing a screwdriver into suspect areas—if the wood is soft or crumbles, it’s time for a replacement.
If I’m replacing boards or driving in new fasteners, I take the opportunity to waterproof the deck . Trex Protect™ tape stops moisture from seeping into the joists and beams, preventing rot and extending my deck’s life. Ideally, this is done at the start of a deck construction project but can be used where boards are replaced.
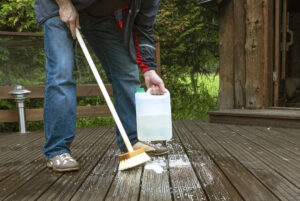
2. Cleaning and Surface Preparation
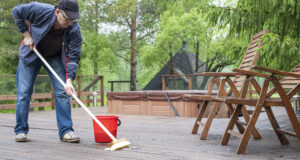
Cleaning and surface preparation are essential for removing dirt, mildew, and any old finishes. The method I choose depends on the deck material:
- Timber Decks: I use a deck cleaner specifically designed for wood to strip away grime. A stiff brush works well for scrubbing, but I make sure to rinse thoroughly.
- Composite Decks: A mild soap and water solution with a soft brush does the trick—harsh chemicals can damage the surface, so I always avoid them.
If I’m using a pressure washer on a timber deck, I keep it on a low setting to prevent damage. Then, I let the deck dry completely before moving on to the next step.
3. Repairing and Replacing Damaged Components

Once the deck is clean, it’s easier for me to spot damaged areas. If I see rotten, cracked, or badly warped boards, I know repairing and replacing damaged components is a must. I replace them with matching timber or composite material to ensure a uniform appearance. When securing boards, I always use high-quality deck screws instead of nails—they provide a stronger, longer-lasting hold.
I also check railings, stairs, and support beams. Loose or wobbly sections can be a major safety risk, so I tighten or replace any weak spots.
One advantage of composite decking is its longevity, and it requires little maintenance. Having a damaged board is rare. Reach out to the deck manufacturer for new boards that will match your current deck and to check on warranty coverage.
4. Sanding and Smoothing Surfaces
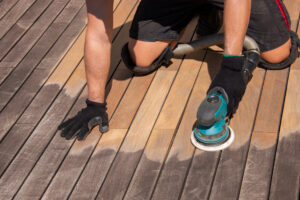
Sanding and smoothing wood surfaces is one of my favourite steps because it makes a huge difference in how the deck looks and feels. Sanding removes splinters and rough patches, creating a smooth, barefoot-friendly finish. I use a belt or orbital sander with medium-grit sandpaper and focus on:
- Deck boards and edges
- Railings and balustrades
- Steps and seating areas
I’m always careful not to oversand, as this can weaken the timber or strip away too much protective material.
5. Staining or Oiling the Deck
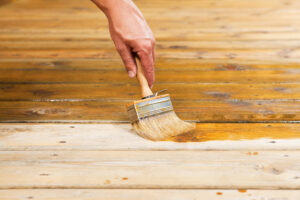
Applying a protective finish is the final step in restoring a timber deck. Staining or oiling the deck ensures durability and protection from the elements. When I’m choosing a product, I consider the deck material and local climate:
- Decking oil penetrates the wood, providing deep protection and enhancing durability.
- A semi-transparent stain adds colour while letting the wood grain show through.
- Solid stain or paint offers bold coverage but requires more maintenance over time.
I always apply the finish in long, even strokes using a brush or roller. Weather is something I keep in mind too—I avoid applying stain or oil in direct sunlight or before rain, as this can affect drying and adhesion.
Deck Restoration Costs
Restoring a deck doesn’t have to break the bank, but I know cost and budget considerations are important. It’s worth budgeting for quality materials to ensure long-lasting results. Here’s a rough breakdown of typical costs I’ve seen:
- Cleaning supplies (A$50–A$150)
- Replacement boards (A$10–A$50 per board (or per lineal metre, depending on material)
- Sanding tools (A$50–A$200)
- Stain or oil (A$80–A$200 per tin)
If your timber deck is old and requires frequent repairs, I’d recommend switching to composite decking. While the initial investment is higher, composite materials last much longer, require minimal maintenance, and won’t rot or splinter like timber. If you have an old composite deck, it might be time to upgrade to a new composite deck. Remember, building a new deck is the best time to waterproof the structure.
How to Maintain the Restored Deck
Once your deck is fresh again, maintaining the restored deck is something I emphasise. Here’s what I do to keep my deck in top shape:
- Sweep regularly to remove dirt and debris
- Wash with a mild cleaner at least twice a year (more frequently based on weather or spills)
- Inspect for loose screws, warped boards, or signs of wear
- Reapply wood stain or oil as needed, usually every 1–2 years
For composite decks, I follow the manufacturer’s cleaning guidelines—these require much less upkeep than timber but still benefit from regular cleaning.
Outdoor rugs, mats for grills or planter pots, and protective tips for furniture legs are other ways to protect your deck’s surface from scratches or stains.
Upgrading and Enhancing Deck Features
Once I’ve restored a deck, I think about upgrading and enhancing deck features to make it more functional and appealing. Adding built-in seating, installing LED deck lighting, or incorporating a pergola for shade can transform a deck into a truly stunning retreat. For a long-term investment, switching to composite decking or installing a waterproofing system like Trex® RainEscape® can further extend the deck’s lifespan and usability.
Conclusion
Restoring a deck is a straightforward process that I’ve helped homeowners do many times, and it can make a world of difference to your outdoor space. By following these steps—inspecting and assessing deck condition, cleaning and surface preparation, repairing and replacing damaged components, sanding and smoothing surfaces, and staining or oiling the deck—you’ll not only improve your deck’s appearance but also extend its life and ensure safety for many years to come.